Baking sourdough bread can be a rewarding process, but it does require a bit of patience and understanding of how sourdough works. Here’s a basic guide to help you get started:
1. Prepare Your Sourdough Starter:
This is the most crucial step! You’ll need an active, bubbly sourdough starter. If you don’t have one, you’ll need to create one from scratch (which takes about a week) or get one from a friend. A healthy starter should double in size a few hours after feeding.
2. Feed Your Starter:
The night before you plan to bake, feed your starter. Discard all but about 50-100g of your starter, then feed it equal parts (by weight) of water and bread flour. For example, 50g starter, 50g water, 50g bread flour. Let it sit at room temperature overnight. It should be active and bubbly in the morning.
3. Autolyse (Optional but Recommended):
In a large bowl, combine your flour and water. Mix until just combined and no dry spots remain. Cover and let it rest for 30-60 minutes. This step, called autolyse, helps the flour fully hydrate and develop gluten, making the dough easier to work with.
4. Mix the Dough:
Add your active sourdough starter and salt to the autolysed dough. Mix thoroughly until all ingredients are well combined. You can use your hands or a stand mixer with a dough hook. It might be sticky at first, but keep mixing until it starts to come together.
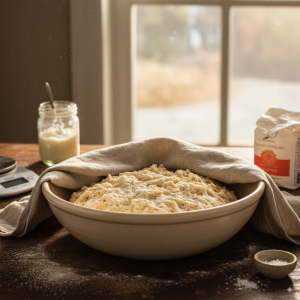
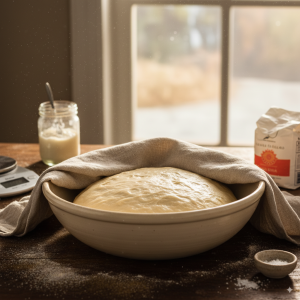
5. Bulk Fermentation (First Rise) with Folds:
This is where the magic happens! Over the next 3-4 hours (or longer, depending on your room temperature and starter activity), you’ll perform a series of “stretch and folds.”
-
Initial Stretch and Fold: After about 30 minutes, gently stretch one side of the dough up and fold it over to the opposite side. Rotate the bowl and repeat with the other three sides.
-
Repeat: Do this every 30-60 minutes for the first 2-3 hours of bulk fermentation. This helps develop gluten and creates structure in your bread.
-
Monitor: The dough should become smoother, more elastic, and increase in volume by about 20-30%.
6. Preshape and Bench Rest:
Lightly flour your work surface. Gently turn the dough out onto it. Carefully shape the dough into a loose ball. Cover it with a clean kitchen towel and let it rest for 20-30 minutes. This helps the gluten relax, making the final shaping easier.7. Final Shaping:
This is where you give your bread its final form. There are many ways to shape sourdough, but a common method is to create tension on the surface. Gently flatten the dough into a rough rectangle. Fold the top third down, then the bottom third up, like a letter. Then, starting from one end, roll the dough tightly towards the other end. Pinch the seam closed. Place the shaped dough, seam-side up, into a floured banneton (proofing basket).8. Cold Proof (Second Rise):
Cover the banneton with a plastic bag or plastic wrap and place it in the refrigerator for 12-18 hours. This slow, cold proof develops flavor and makes the dough easier to handle.9. Preheat Your Oven and Dutch Oven:
About an hour before you plan to bake, place your Dutch oven (with the lid on) in your oven and preheat to 450-500°F (230-260°C). Getting the Dutch oven extremely hot is key to a good crust. -
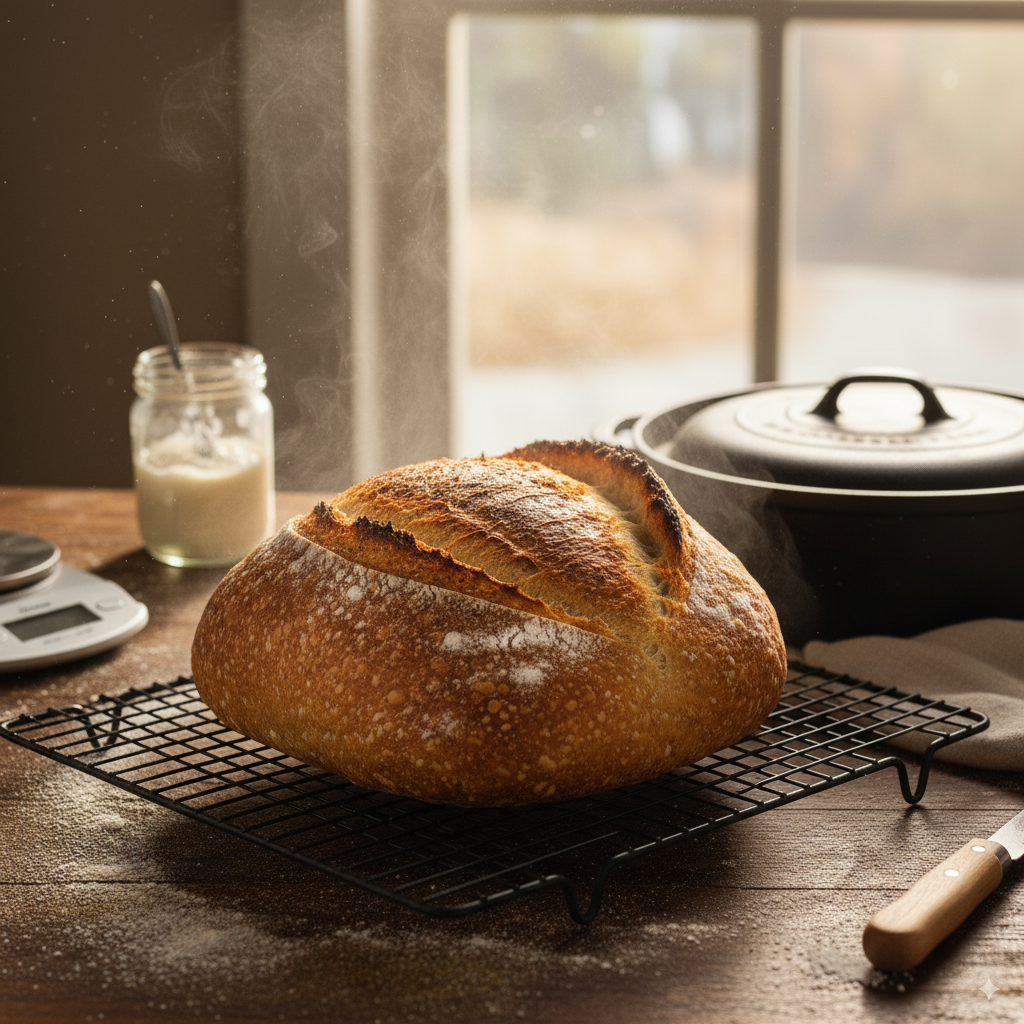
 10. Score and Bake:
Carefully remove the hot Dutch oven from the oven. Gently invert your cold dough into the Dutch oven. Using a sharp razor blade or lame, score the top of your dough. This helps control where the bread expands.-
Bake with the lid on for 20-30 minutes. This traps steam, creating a soft crust and allowing for maximum oven spring.
-
Remove the lid and continue baking for another 20-30 minutes, or until the crust is deeply golden brown and the internal temperature reaches around 200-210°F (93-99°C).
11. Cool:
Transfer the baked bread to a wire rack and let it cool completely for at least 1-2 hours before slicing. This is crucial for the crumb to set properly and for the flavor to fully develop.
-